Corrugated metal stands out as a durable, cost-effective, and visually appealing roofing option. Whether you’re looking to replace an existing roof or embark on a new roofing project, corrugated metal roofing offers numerous advantages. In this comprehensive guide, we will walk you through the step-by-step process of installing corrugated metal roofing using the expertise of James Kenton.
The Appeal of Corrugated Metal Roofing
Before we get into the installation process, let’s briefly explore why corrugated metal roofing has become a popular choice for homeowners and builders alike:
1. Durability
Corrugated metal roofing is known for its exceptional durability. It can withstand harsh weather conditions, including heavy rain, snow, and hail. It is also resistant to pests and rot.
2. Cost-Effectiveness
While the initial cost of corrugated metal roofing may be higher than some other materials, its longevity and minimal maintenance requirements make it a cost-effective choice in the long run.
3. Energy Efficiency
Corrugated metal roofing can be coated with reflective materials to improve energy efficiency. This helps keep your home cooler in the summer, reducing your energy bills.
4. Versatility
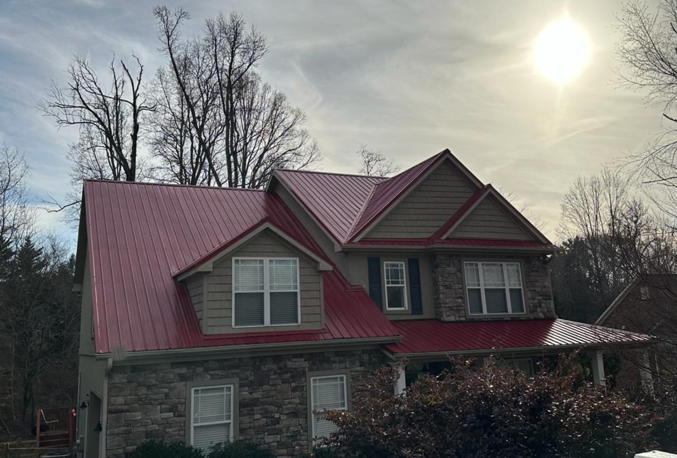
Corrugated metal roofing comes in a variety of colors and finishes, allowing you to achieve the desired aesthetic for your home. It can complement both modern and traditional architectural styles.
5. Environmentally Friendly
Corrugated metal roofing is often made from recycled materials and is fully recyclable at the end of its life. This makes it an eco-friendly roofing option.

Steps to Install a Corrugated Metal Roofing
Now, let’s dive into the steps for installing corrugated metal roofing:
Step 1: Safety First
Safety should always be the foremost concern when embarking on a roofing project. Make certain you have the necessary safety gear, including durable gloves, impact-resistant safety glasses, and a stable and secure ladder. It’s also essential to be mindful of the weather forecast; avoid work on windy or rainy days, as working at heights in adverse weather conditions can pose serious risks to your safety.
Step 2: Measure and Plan
Meticulous planning is key to a successful corrugated metal roofing installation. Begin by accurately measuring your roof’s dimensions, taking into account any architectural intricacies. With precise measurements in hand, calculate the necessary materials, including the number of panels, fasteners, and the required underlayment.
Step 3: Remove Old Roofing (if necessary)
If you’re replacing an existing roof, you need to remove the old roofing materials. This typically entails carefully stripping away the old shingles, underlayment, and any compromised or rotted wood decking. Thoroughly assess the condition of the roof deck to ensure it is structurally sound before proceeding with the installation of the new corrugated metal roof.
Step 4: Install the Underlayment
A robust underlayment is fundamental to safeguarding your roof against moisture infiltration and maintaining proper insulation.
Begin by laying a waterproof underlayment, such as roofing felt, over the entirety of the roof deck. Start at the eaves and systematically work your way up, overlapping the underlayment sheets as you progress. This strategic approach prevents water from seeping beneath the corrugated metal panels.
Step 5: Install the Eave Flashing
Eave flashing plays a pivotal role in preventing water intrusion under the corrugated metal panels along the roof’s edge. Secure the eave flashing firmly in place using roofing nails or screws. Make sure that it extends sufficiently beyond the edge of the roof to create a robust barrier against moisture penetration.
Step 6: Begin Installing the Corrugated Metal Panels
The installation of corrugated metal panels commences at the bottom edge of the roof. Align the first panel with the eave flashing, ensuring it is square and level. Employ roofing screws or nails specifically designed for metal roofing to fasten the panels securely to the roof deck. Take care to place fasteners within the crests of the corrugations, avoiding the valleys to prevent water pooling and potential leaks.
Step 7: Overlap and Secure Panels
As you progress with the installation, each successive corrugated metal panel should overlap the previous one in accordance with the manufacturer’s recommended overlap distance. Maintain vigilance over the alignment of the panels to achieve a uniform appearance. Secure the panels to the roof deck at regular intervals to ensure they remain straight, level, and steadfast.
Step 8: Install Ridge Caps
Once all the panels are in place, focus on installing ridge caps along the peak of the roof. Ridge caps are specifically designed to cover the ridges, enhancing weather resistance and overall aesthetics. Secure these caps firmly using roofing screws or nails, paying close attention to ensure they sit securely and provide additional protection to this vulnerable area.
Step 9: Seal and Finish
To guarantee a watertight seal and bolster protection against the elements, apply roofing sealant meticulously to all exposed fasteners and seams. Thoroughly inspect the entire roof to identify any loose screws or nails, promptly addressing any issues to maintain the structural integrity of your corrugated metal roof. You will also have to trim any excess material as needed to achieve a polished and neat finish.
Step 10: Clean Up and Inspection
Upon the completion of the installation, engage in a comprehensive cleanup of the work area. Remove all debris, metal shavings, and discarded materials to leave a clean and safe environment.
Conduct a final inspection of the entire roof, methodically checking for any potential issues. Ensure that all panels are securely fastened, seams are sealed, and the roof is indeed watertight. This meticulous attention to detail is crucial to ensure the longevity and effectiveness of your newly installed corrugated metal roofing system.
Installing corrugated metal roofing can be a rewarding project that offers durability, energy efficiency, and an appealing aesthetic. Meticulously following the steps outlined by James Kenton will help you ensure a successful installation that enhances the protection and value of your home.
However, if you’re considering a corrugated metal roofing project and seeking expert guidance or professional installation services, there’s no better choice than reaching out to James Kenton in Tennessee. With his extensive knowledge and experience in roofing, James Kenton can provide you with the expertise and assistance you need to make your corrugated metal roofing project a resounding success. Contact James Kenton in Tennessee today!